The Best Geeky Garden Décor on Amazon

After a jam packed, adventure laden Spring Break, we’re back with brand new content!

If you’re like me, you have been counting down the days until the arrival of warmer weather and the opportunity to work on your outdoor living spaces.

Whether you live in an apartment, or have a big back yard, you can create your own little nerdy oasis right outside your door.

Here are some of my favorite Geeky Garden decor ideas!

To start off, why not get a fresh and doormat that fits your personality? These things get worn out so quickly. It is a super easy way to clean up the look of your front porch and entryway!

Here is a very welcoming one with a quote from “The Hobbit”

And here is one with more of a funny Dungeons and Dragons vibe!

Nothing brings a little personality to your garden like an adorable statue or two!

I absolutely cannot wait to get this little dragon to set next to one of the trees in my backyard!

And this little Groot planter is the perfect centerpiece for any outdoor dining table.

If gnomes are your thing, Amazon has you covered!

This itty bitty zombie is ready to display your Living Dead obsession.

Meanwhile, this little guy has fought his way to the Iron Throne.

No fantasy garden would be complete without a few fairies milling about, causing mischief!

You can turn one of your trees into an adorable fairy cottage. Just… maybe put it on a different tree than the peeing dragon… no sense starting a war between your magical creatures.

Look at this gorgeous fairy wind chime/suncatcher. Every little touch goes a long way into making your space feel special!

Make sure your space is ready for a fun evening garden party with some creative lighting choices!

This Star Wars outdoor lantern is just vaguely nerdy with its Death Star battle cutouts. Truly the definition of Geek Chic!

And this one has more of a cottage vibe with a cute AT-AT design!

For my fellow nerdy gamers, we can still enjoy our favorite past time while getting some fresh air in the great outdoors!

Giant Yahtzee gives you the opportunity to roll giant dice in the grass!

While this giant game of Connect Four is fun for the whole family!

Finally, a geeky backyard wonderland wouldn’t be complete without some sweet tech!

Ratchet up the ambience and add some music to your outdoor living space with this adorable Harry Potter outdoor Bluetooth speaker.

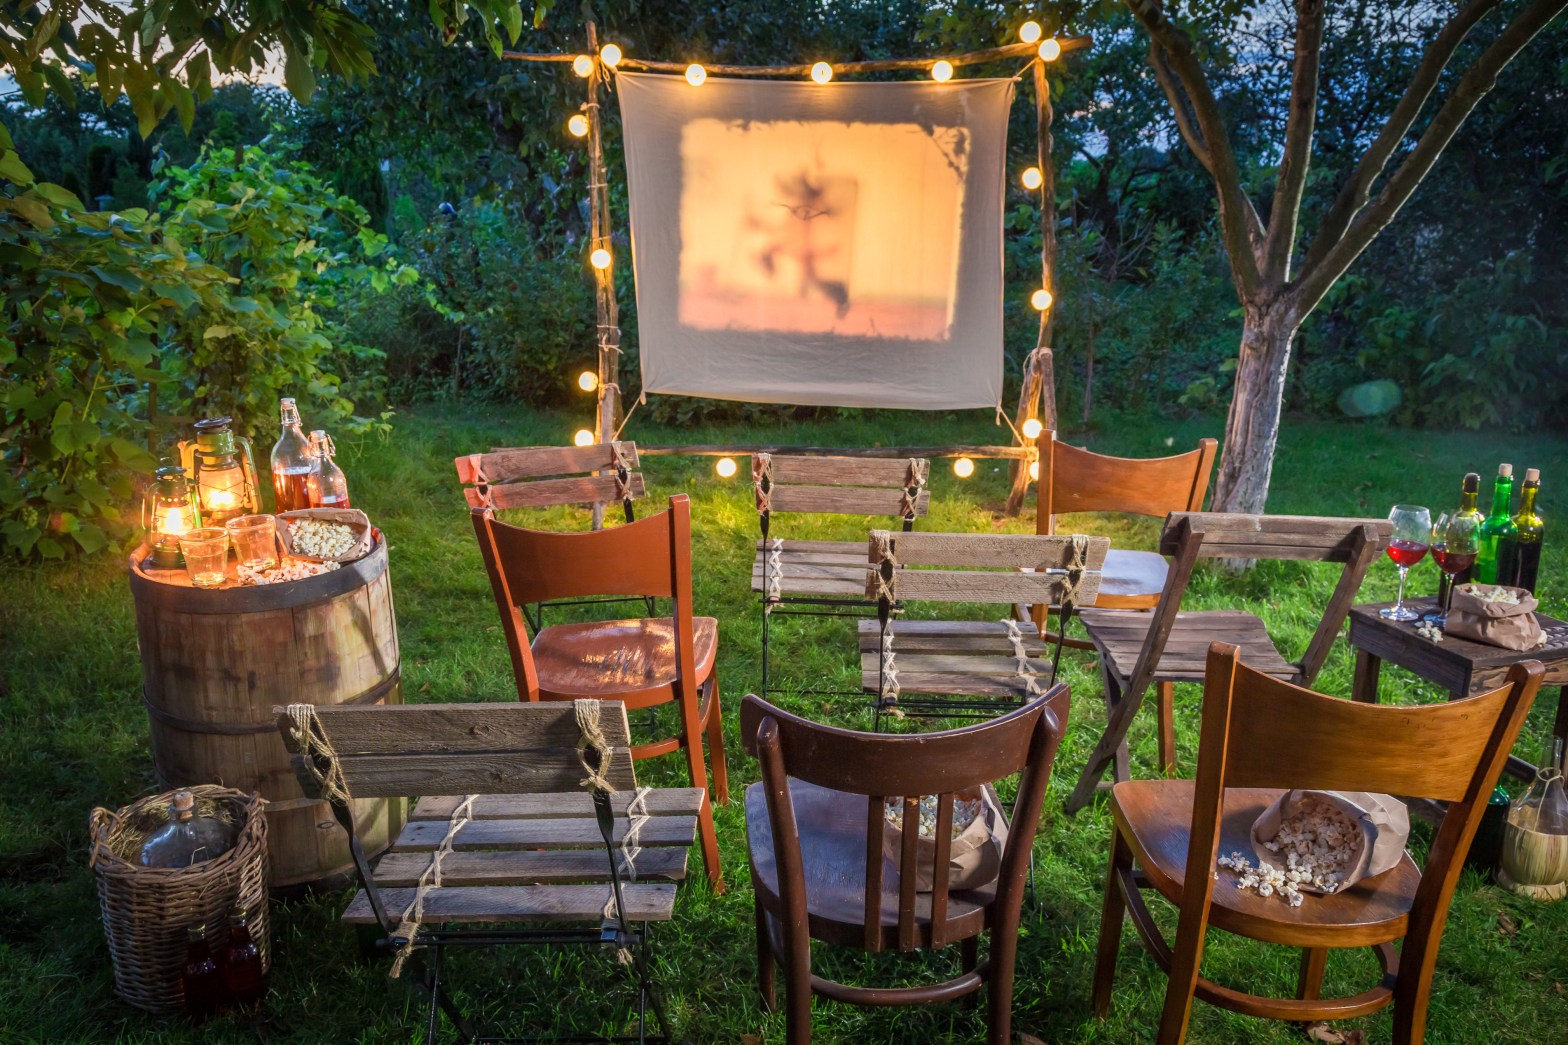
And for your next movie night marathon, why not set up under the stars with a large bedsheet and a mini outdoor projector?

Remember, your outdoor space is an extension of your home, and should reflect your unique interests and personality!

Now get out and enjoy the beautiful weather!

First Time Dungeon Master Pep Talk

I’ve been playing DnD weekly, without much interruption, for close to 10 years now.

Pathfinder, 5th Edition, Whitewolf, Dresden Files, Multiverse, Shadowrun, Midgard, The FATE system… you name it, I have tried it. And if not, I’ve probably heard about it.

But, until a few short weeks ago, I have never been the Dungeon Master.

Why?

Being a player character has its perks. You only have one character to worry about. The prep time is minimal. And, unless you are just one of those players with no manners whatsoever, its not your fault if the plot falls apart, or if someone isn’t having a good time.

Being a DM is a lot of work. I knew this going into it. But boy, was I in for a rude awakening.

My brother is our default DM. He has been doing it forever and he is amazing at it… to the point that trying to DM for him is incredibly intimidating.

But he is busy with life and school and all that grown up stuff, so he asked if I would run something. Hesitantly, I told him I would run a pre written module. No way was I going to try and write something of my own, as he had done for us many times. I didn’t have the confidence for that.

He said that was fine. So I chose Dragon Heist. It is a 5th edition level 1-5 module set in the iconic city of Waterdeep. This is a setting and system I was really familiar with.

Cool.

I chose players who were all less experienced than me, including two complete noobs, to boost my self confidence.

Cool.

Then I started reading.

Did you know that modules are basically just an outline? They don’t answer all the questions. They don’t tell you what to do in every possible scenario your players might get themselves into.

It’s just an outline.

Everything else is up to you to either:

  1. have enough forethought be able to prep for what they chose to do, or
  2. make up on the fly.

Our first sessions were a complete wakeup call for me. I was in charge. I set the DCs if they wanted to do something “off script”. I made up the personality of the random guy at the bar they decided to talk to. I pulled a name out of my butt when a non player character said that they changed their name but the book didn’t say what their name used to be…

It all sounds like little stuff, sure. But there are hundreds of those tiny decisions that you have to make in a 3 hour session. HUNDREDS.

After a bit, the knowledge and experience I had as a player started to kick in. I was able to pull from my gaming history to make quick decisions and give the characters the freedom to do off the wall things. It started to feel a bit organic. A bit less intimidating.

Because, in the end, it’s about having fun. And, lets face it, being the bad guys can be REALLY fun.

Knowing all the answers and watching your players slowly figure it out can be REALLY fun.

Playing different characters every week, mixing up your experience, keeping it fresh… that can also be REALLY fun.

I see so many people on local groups and forums looking for DMs because all their friends want to play but no one feels confident enough to run the game… so they never get a game off the ground at all. Its incredibly unfortunate.

The resources, everything you need, can be found online. And if someone at your table wants to give you a hard time for having to look up a rule or makes fun of you for tripping up, that’s not someone you want to play with anyway.

So, if you have played DnD, but never run, I suggest giving it a go. Pick a module. Run it in a way that is fun for you. Your fun will be contagious, and you will be successful.

I promise!

Easy Bacon Wrapped Asparagus

Hello spring!!!

If you are looking for a gorgeous and simple Sunday brunch recipe for your Easter celebration, I have the perfect thing for you to try!

This recipe is found in Heroes’ Feast: The Official DND Cookbook, which as my regular subscribers know is one of my favorite, go to recipe books for all things nerdy and delicious!

These bacon wrapped asparagus or “Greenspear Bundles in Bacon” as Heroes’ Feast calls them are called a “preperation technique” created by half-elves, who are liberated from certain culinary taboos of their elven brethren.

No matter what you call them, they are a colorful and healthy option that really makes your Easter spread pop!

All you are going to need is:

  • 2 pounds (about 32) medium-thick asparagus spears, tough ends snapped off
  • 1 Tablespoon extra virgin olive oil
  • Salt and pepper to taste
  • 8 slices of bacon
  • 1 1/2 tablespoons of finely chopped fresh chives for garnish (optional)

This recipe serves 4, so if you are having a larger gathering, I’d recommend doubling it!

Directions:

  • First, you are going to need to clean and snap your asparagus. If you have never done this before, have no fear brave adventurer! It is really simple! You hold the asparagus towards the non leafy end with both hands and simply “bend” the stalk until it snaps naturally. This will remove the tough end of the stalk leaving just the tender bit!
  • Next you will need to coat your asparagus spears with olive oil, salt, and pepper. Since I was also entertaining vegetarians, I coated some extra asparagus and put them, loose, on a separate cookie sheet. They still turned out delicious and it was something my guests could enjoy too!
  • Once they are good and coated, you will then wrap 4-5 spears in one slice of bacon. You will lay the bacon at an angle so that as you are wrapping, the bacon doesn’t completely overlap itself. The number of spears you wrap depends on how thick the stalks are. The recipe calls for medium-thick stalks, but the grocery store by me only had thinner ones. Because of this, I added an extra spear to my bundles.
  • Then you will lay out your bacon wrapped asparagus on a cookie sheet, making sure the loose end of the bacon is on the bottom so it doesn’t come unraveled!
  • Finally, you will pop the cookie sheet in the oven at 425 degrees for about 15 minutes.

One thing I noticed is that my bacon didn’t get as dark and crispy as I normally like it. I think it was an issue of the water from the fresh vegetables causing the bacon to steam or bake rather than brown as much as I like.

To overcome this, I plan on broiling the bacon wrapped asparagus for a couple minutes at the end, just to get the crispiness I enjoy. If you try this technique, let me know in the comments if it works for you!

Either way, the dish was a hit! It looked so beautiful on a serving dish and made for a healthy option that even the kids enjoyed!

As you are planning your Easter celebrations, look for simple things you can do like this to make the table a bit more special, and a little more nerdy!

“Zombies, Run!” For Beginners

Now that the spring weather has finally arrived, I am so excited to get outside for some of that natural Vitamin D!

Like many of us, I have lost a lot of my physical stamina while being stuck in during the Pandemic, and have been looking for ways to get more active! so I am really excited to share with you my new fitness obsession: the app Zombies, Run!

Zombies, Run is a free phone app that can be found both in the iTunes store and the Google Play store.

How does it work?

The app is a story based running game. You are a “runner” for an outpost of survivors during a zombie apocalypse. Your job is to complete missions and pick up supplies for your camp along the way.

The story is entirely voice acted, including sound effects. The experience is really immersive when you are running down a quiet wooded trail with both of your earbuds in.

Once you have finished a mission, you can return to base and build onto it with the supplies you found on your run. This Sims style mini game is really fun and makes the entire game more addictive!

If Zombies aren’t really your thing, have no fear! Zombies, Run has a dozen or so other stories to chose from including Little Red, Track the Ripper, and Spellcast.

If you want to get back to nature, the Grand Canyon missions talk about the history of this beautiful place as you run!

Like I mentioned above, the app is free to download. You can, however, pay for a VIP membership which unlocks all modes and features including the supplies pickup mini game and access to your statistics. You will also get Season 4 of the Zombies, Run main storyline.

The app is catered to those who can already run for about 30 minutes straight. It is perfect for those who have the stamina to run for longer periods of time, but wish to decrease their time and increase their speed.

The way it accomplishes this is through random Zombie encounters. Every run will be peppered with zombie attacks. When this happens, you are prompted to increase your speed to outrun them while the zombies grunt in your ear. It really feels like they are right behind you! The default setting requires you to increase your pace by 20% for a burst of speed to evade the zombies.

This means that even if you are not a runner, you can enjoy Zombies, Run or one of the other fun story modes in the game. All you have to do is walk instead of run, and increase your walking to a brisker pace when prompted to increase speed!

What if you are like me and are not quite ready for a 30 minute straight run but want to work your way towards that goal?

Here’s what I did!

I downloaded a separate couch to 5k app. These programs are interval training specifically designed to help you go from walking all the way to running a 5k. The apps prompt you to walk/run in timed intervals. The farther you get into the training, the shorter the walks get and the longer the runs get until you are running the entire length of the exercise.

By pairing these 2 apps and running them simultaneously, I have been able to do the interval training I need to build my stamina while at the same time enjoying the story telling aspect of Zombies, Run!

So, no matter where you are in your physical fitness, you can enjoy this app and learn to love getting outside and exercising! In fact, get the whole family in on the fun!

This app has been a fun way to get back into some better habits. If you have a chance to download it and check it out, I’d love to hear how it works for you!

Harry Potter’s Super Easy Lemon Meringue Pie Sundae

In celebration of Pi day, I was looking for a delicious pie recipe that would appease my ice cream obsessed kid.

As I was flipping through The Unofficial Harry Potter Cookbook, I came across this Lemon Meringue Pie Sundae recipe! It is an incredibly simple, creative mash up of two traditional desserts, and it was a huge hit with the whole family!

You can almost picture Harry and his friends sitting outside Florean Fortescue’s Ice-Cream Parlour in Diagon Alley, chatting and eating their delicious sundaes and planning their next adventure!

Here is all you need to make it yourself!

  • Vanilla Icecream
  • 2 Tablespoons of store-bought lemon curd or lemon pie filling
  • Meringue cookies

My grocery store didn’t have meringue cookies, so I ended up getting this container of Trader Joe’s brand cookies from Amazon. They actually make a really good, low calorie snack to munch on when you have a sweet tooth!

To make your sundae, you will start by adding a scoop of vanilla icecream, and 2 tablespoons of your lemon filling.

We tried the Lemon Curd first because I had never had it before so I was interested to give it a go!

My recommendation is that, if you really love a strong lemon flavor, go with the lemon curd. If you want something a little more subtle and sweet, try the lemon pie filling. Either way, the creamy ice cream cuts the sweetness and makes for a very tasty pairing!

Finally, you will crumble some of your meringue cookies and sprinkle them on top.

Depending how big of a serving you want, the book suggests repeating this process for a second layer.

I put ours in fancy margarita glasses, and the single scoop was actually a very satisfying dessert.

I hope you enjoy our twist on a Pi Day celebration. I look forward to using this recipe during get togethers this summer, as it would absolutely make the perfect summer time treat!

Simple Knitting to Ease Anxiety: How to Get Started

I love knitting.

No, let me rephrase that… I NEED knitting.

As someone who lives with Generalized Anxiety Disorder, I struggle everyday with the imbalanced chemicals in my brain. I also have these fun (insert sarcasm here) compulsions called Body Focused Repetitive Behavior.

According to bfrb.org, “Body-focused repetitive behavior (BFRB) is a general term for a group of related disorders that includes hair pulling, skin picking, and nail-biting, affected at least 5% of the population.  These behaviors are not habits or tics; rather, they are complex disorders that cause people to repeatedly touch their hair and body in ways that result in physical damage.”

It is exhausting, it makes my arms and fingers ache, and its something I do without even thinking about it.

And, of course, it is always worse when I am anxious.

The year 2020 was a bad year for anxiety disorders.

However, with all the extra time on my hands during months of quarantine last year, I decided to take up knitting.

Let me tell you, it has changed my life.

The repetitive motions of the stitches mimic my previously harmful behavior. The soft yarn feels comforting in my hands and laying on my lap, like a warm safety blanket. The amount of mental focus needed to follow a knitting pattern allow me to keep my thoughts on the present moment, better than any amount of yoga or guided meditation ever has.

Kitties love knitting time too

As a person with anxiety, I can tell you that we tend to struggle with many of life’s most important lessons. The thought of a long, difficult project fills our minds with “what ifs” and paralyzes us with fear. We get so caught up in our own mistakes, that we have a hard time getting past them. We concern ourselves so much with what might happen, that we forget to enjoy the present.

Knitting can teach us how to deal with these feelings.

How to persevere through a long and arduous task without giving up.

How to be brave enough to “unravel” something that isn’t working and stitch it back together again.

How to enjoy the journey on the way to your destination.

Because knitting isn’t just about the product, it’s about the experience along the way.

I can’t think of a more perfect analogy for life than that.

So, if you are feeling anxious, pick up a pair of knitting needles and give it a try. You might learn more than you ever expected.

You might be with me this far but wondering to yourself, “Where do I start?”

First, you’re going to need a pair of needles. I recommend starting with one of the larger sizes, as they are easier to control. Bamboo is also easier to use than plastic or metal as the wood creates more “drag” on the yarn, keeping it from slipping off the needle when you don’t want it to!

You will need some yarn. A heavy weight wool is, again, nice and big so its easy to see and work with. It also doesn’t “slip” off of the needle as easily as say a silk or cotton would, so it is easier to control.

Finally, you will need to learn three different techniques. The long tail cast on, and the knit stitch, and the bind off.

With just these three techniques, you can create your first flat piece. I recommend starting with a scarf! There is very little counting involved (you can pretty much just eyeball the width and length you want), so it is low stress and super simple.

My first scarf has serious Doctor Who vibes and I love it!

Keep your knitting nearby, and teach yourself to reach for it whenever you are feeling anxious, or when you are most likely to fidget, for example when watching TV.

As a bonus this has also greatly reduced the amount of junk food I eat while watching shows in the evening!

Make something beautiful for yourself, or someone you love.

Matching Scarves!

I can’t wait to see what you create!

Dungeons and Dragons Date Night

If you browsed my list earlier this month of nerdy Valentines Day gift ideas, you may have seen this DnD module from Amazon:

Date Night Dungeons: A Couple’s Adventure Module is a 3rd party adventure that can be played in either the 3.5 Version of Dungeons and Dragons or in Pathfinder Version 1.

I purchased the module in the Pathfinder compatible version since that is the system we are most versed in. However, they do say in the description that they will soon be releasing it in Dungeons and Dragons 5th Edition as well.

So, what is Date Night Dungeons?

I wasn’t sure what to expect when I made my purchase, but it seemed like a fun way for my husband and I to play DnD on nights when we aren’t able to get together with a group of friends to play.

The Module is entitled “Rescue of the Blackthorn Clan” and is made for two level 4 characters. The characters are premade, so that part is already done for you. You and your partner can choose between the Ranger or the Wizard.

The writers point out that while the ranger is written as a man, and the wizard as a woman, the genders and sexual orientations of the characters are fluid.

This module starts off like any other module you may have played. A plot, a mystery villain, and a kidnapping sets the scene for immediate immersion.

The book is a 4 part series that includes full color maps and lots of cool handouts.

You and your partner can choose how to divvy up the Dungeon Master roll. One person can DM the entire game, or you can split it up and take turns on each part.

The module is written so that DMing one section will not spoil the secrets you uncover in the next as long as you don’t read ahead.

So, where does the date night come in, you ask?

The creators of Date Night Dungeons have added their own homebrew rules to the basic Pathfinder/DnD format. This novel “romance” system allows the two characters to (hopefully) fall in love, dice willing.

The two new character attributes that you will need to keep track of are “Turn Ons” and “Pet Peeves”. These are listed in a table that you can either roll on, or choose from, depending on your play style. We decided to roll for them to make things interesting!

You will then roll for your First Impressions each other. Depending on your roll, your character may distain the other, feel indifferent about them, or already have a little crush.

You will keep these attributes a secret from the other player. They, and their character, will have to get to know your character as you play!

For example, if one of your Turn Ons is “someone with a sense of humor”, then every time the other player/character makes you/your character laugh, you will roll to add to your “Attraction Points”.

If, on the other hand, you have “someone who is incompetent” as a Pet Peeve, then every time they fail a skill check by 5 or more, you will roll to subtract from your “Attraction Points.”

The farther away from zero your Attraction Points climb, or dip, the stronger your feeling are for the other PC, whether positive or negative.

There are other ways during combat to add and subtract from Attraction Points as well, such as scoring a critical hit or slaying an enemy.

You can also trade 5 positive or negative Attraction Points to roll another random Turn On or Pet Peeve. This makes it easier to add or subtract points more quickly and adds more dimension to your characters and your roll play.

Other than that, the module plays out like any other. In fact, you could ignore the romance rules all together and just play it as a standard two player DnD game.

On the other hand, if you wanted to lean into the romance side, there is an extra credit point system for acting out “displays of affection” in real life! (If you call that your character reaches out to hold the other’s hand, you would do the same, etc.)

It can feel cheesy at first, but it was actually really fun, and we laughed a lot! Especially because my character fell head over heals FAST for the handsome ranger, and he is still pretty indifferent about me.

Whether or not your characters fall in love depends, like everything in DnD, on a roll of the dice.

So, may the dice be ever in your favor, and may you find love in unexpected places!

“How To Train Your Dragon” Kids Bedroom Inspiration

Since we couldn’t have a birthday party this year (thanks again, Covid), we decided to take the money we would normally spend on renting a venue, and food, and all of that stuff, and put it towards redecorating our daughter’s bedroom.

We told her she could do it however she wanted! Since she was turning 7, she was getting away from the “baby” looking stuff, and wanted a room that reflected her new “big girl” persona.

After very little deliberation, she knew exactly what she wanted. A “Toothless” bedroom.

Toothless is the main dragon from the show. He is all black, very cute, and is basically a mix between a hyper puppy and a silly kitty. And he can fly and shoot energy out of his mouth.

Basically the perfect animal to a 7 year old.

So we went about finding ways to transform her room into the town of Burk, and her décor into an homage to dragons.

I found it challenging to find enough “How To Train Your Dragon” merch, so we had to get creative. If you are reading this, maybe you are having the same problem!

First, we let her pick the paint color. She wanted “Toothless eye green”. So, we packed up our stuffed Toothless and headed to the paint store.

We ended up getting a Valspar paint called “Parakeet Green”. It is a nice, warm, avacado green color that really brought the space to life!

We then went on Amazon to get some merchandise. Here are some of my favorite pieces we picked out.

I really love a tapestry. Its a great way to make an accent wall without the time and commitment!

This Viking helmet light was my favorite find. It was the most expensive piece we bought, but man, was it worth it! The light is metal and very sturdy. Be warned, though, the light the bulbs can get very hot. To avoid future injuries, I’d recommend replacing them with LED lights.

Since we love a good LARP, my daughter was all about picking out a foam axe to add to the room! We hung it with a leather strap so that she can take it down and play with it when she wants to! A toy and cute decor, win/win!

For curtains we went a little more abstract. Our Toothless is a “Night Fury” so we did a starry sky. I love these because they are also black out curtains. They work pretty well at helping kids sleep in on Sunday Morning!

Details matter! This lightswitch cover featuring a Viking longboat was a small purchase, but it ties in so nicely with the curtains and gives the room a little something extra!

This toothless nightlight pillow was a gift for her birthday from her grandma, and she absolutely loves it. The batteries run out pretty quick, but thankfully you can set it to turn off on its own after an hour or so.

We interspersed these purchases with some of our own personal items. The dragon pop up book above her piano was my brother’s when he was a kid. The dragon origami was a Love Pop card my husband got me for our anniversary! And the How To Train Your Dragon box set was a birthday present.

The electric ball that she bought with her chore money ages ago looks just like the energy blast toothless shoots out of his mouth!

Finally, a couple unique gifts and purchases from Etsy, or another small vendor, really make the room feel special, and not just store bought.

We found a Toothless piggy bank on Etsy, and friends of ours purchased this hand made picture of Toothless and the Light Fury.

A kid’s room is their sanctuary. A place that they can call their own in a world that can be so confusing, and loud, and challenging. Their bedroom is their safe space.

They can read, they can color, they can watch their favorite shows, they can even just take time to breathe.

So, I hope that you and your kids now feel inspired to go out and create the perfect space that reflects the amazing person they are!

Fabulous Fallout Clam Chowder (Gulper Slurry) Review

This month, we are featuring a few recipes from the Vault Dweller’s Official Cookbook from the Fallout franchise. If you don’t have one yet, you can pick it up here:

Previously, we baked up a Perfectly Preserved Pie that was just as pretty as it was delicious!

This week, I recreated the Gulper Slurry, a thick and creamy clam chowder that was the perfect way to warm our souls while watching the falling snow this past weekend.

The recipe is rated Difficulty Level: Medium

I would say the hardest part about this recipe is oven control! You need to heat it without boiling it, which can be a little tricky if you don’t have a good idea how your particular oven functions. However, if you keep a close eye on things (make sure to pop a few points in perception), the rest is a simple dump it and go recipe!

The recipe calls for a dutch oven, which I don’t have unfortunately. So, in my recreation, I used a cast iron skillet for the bacon, and a large soup pot for the rest. If you have a dutch oven though, you can do everything in one place, which means less clean up at the end! (Yay!)

Ingredients:

  • 3 slices of thick cut bacon (I made 6 because I love bacon!)
  • 1 medium yellow onion, chopped
  • 3 garlic cloves, minced
  • 2 celery ribs, chopped
  • Two 10-oz cans whole clams
  • 1 cup vegetable broth
  • 2 bay leaves
  • 1 teaspoon dried thyme
  • 3 yukon gold potatoes, peeled and cubed (you want them to be bite sized)
  • 1 cup heavy cream
  • 1 cup half-and-half
  • 2 teaspoons Worcestershire sauce
  • 2 tablespoons cornstarch
  • 2 tablespoons water
  • salt and pepper

Instructions:

  • Chop, Chop, Chop the potatoes, onion, and celery
  • In a cast iron skillet over medium heat, lay the bacon strips flat across the bottom. Cook the bacon until crispy.
Mmm… bacon
  • Remove the strips and let them drain on a plate lined with paper towels. Once cooled, crumble the bacon and set aside.
  • Transfer the bacon grease from the cast iron skillet to the cooking pot. Bring up to medium heat.
  • Add the onion, garlic, and celery to the pot and cook in the bacon fat until softened, about 5 minutes.
  • Drain the juice from the cans of clams into the pot, and set the clam meat aside.
  • Add the vegetable broth, bay leaves, thyme, and potatoes and turn heat up to medium-high to bring to a simmer.
It’s starting to look like soup!
  • Cover and reduce heat to medium-low and cook for 15 minutes, until the potatoes are tender.
  • Stir in the clams, heavy cream, half-and-half, and Worcestershire sauce.
  • Remove the bay leaves.
  • Season with salt and pepper.
  • Heat on medium until the soup is warm, but do not boil.
  • In a small bowl, stir the cornstarch and the water together to make a slurry.
  • Add the slurry to the soup and stir until the soup has thickened.

To serve, add the soup to a bowl (or a bread bowl) and top with bacon crumbles. We served ours in a regular bowl with a side of sourdough bread to sop up the broth.

It was the perfect Valentines dinner in because it reminded us of our honeymoon in San Francisco, where we would stroll along the wharf and pick up large bread bowls of clam chowder for lunch.

If you guys like this soup recipe, you should also check out Dice Mom’s take on Traveler’s Stew from the Dungeons and Dragons Official Cookbook.

I’ve never been so happy for soup season!

This soup was really good, but it was even better the next day as leftovers!

In the Vault Dweller’s Official Cookbook, there is a note under the recipe. It says, “In order to make the necessary space for the clams in Vault Warehouses, the amount of medical and operational resources for each vault has been reduced accordingly.”

After tasting this soup, I’m not even mad about it!

Fallout’s Perfectly Preserved Pie Recipe

This month, I decided to crack open The Vault Dweller’s Official Cookbook by Victoria Rosenthal.

My husband is a huge fan of the entire Fallout franchise. So, in celebration of Valentines Day, I wanted to make him some special dishes based on the video games!

This is one of my favorite nerdy cookbooks for one big reason. Every single recipe is accompanied by at least one picture. The book is chalk full of gorgeous photography.

If you don’t already own this one, I would highly recommend it!

In Fallout, Perfectly Preserved Pie can be found in any Port-a-Diner and will imbue you with a +4 luck bonus for four hours.

Who couldn’t use a little of that?

This recipe is listed as “difficulty: hard”. I think this is because there are a couple of preparation techniques that are uncommon, meaning they may be things you haven’t done before. But have no fear! We’ve got this!

Also, this recipe takes a decent amount of prep time. You are going to need to do the bulk of the work the day before you plan on serving it. I have broken the recipe down into the 3 main parts:

  1. The pie
  2. The strawberry topping
  3. The icing

The Pie

The pie is listed as “cheesecake” in the recipe, but it has a much more fluffy, light consistency than most cheesecakes I have had. The other two parts are very rich, so it was actually a welcome surprise, as the pie and toppings complimented each other nicely!

You are going to need a springform pan for this recipe. This is a cake pan that has a removable “wall”, allowing you to remove the cake once it is set.

This is what you want:

Ingredients:

  • 1/4 cup heavy cream
  • 1/2 vanilla bean, split and scraped (see instructions below)
  • 1 pound cream cheese, at room temperature.
  • 3/4 cup sugar
  • 3 eggs
  • 1/2 cup sour cream
  • pinch of salt
  • 2 tablespoons cornstarch
  • 1 tablespoon vanilla extract

Instructions:

  • Take the cream cheese out of the fridge and put on the counter until it reaches room temperature.
  • Preheat oven to 275
  • Scrape the vanilla bean. In order to do this, you are going to take the bean and split it down the middle length wise with a sharp knife. Then, with the tip of the knife, carefully scrape out all of the brown “gunk” out of the bean.
  • Combine the heavy cream and the scraped vanilla bean in a small bowl and set aside. You will start to see small flakes of black in your cream, similar to French Vanilla icecream!
  • In a standing mixer fitted with a whisk attachment, whip the cream cheese until smooth. You will need to scrape down the sides throughout to make sure all of the cream cheese is completely smooth.
  • Add the sugar and mix well.
  • Add the eggs, one at a time.
  • Remove the vanilla bean from the heavy cream.
  • Pour the heavy cream, sour cream, salt, cornstarch, and vanilla extract into the cream cheese mixture. Mix well.
Adding (premeasured) ingredients is a great job for the kids!
  • Wrap the outside of a 9-inch springform pan in aluminum foil. This will prevent any water from entering the pan. Make sure the foil comes up the sides at least half way all the way around.
  • Butter the inside of the pan. My daughter did this by taking a stick of butter and holding it while wearing a plastic bag as a glove. She thought it was very fun!
  • Carefully line the pan with parchment paper. This started to feel like overkill, but all of these steps are to keep the cake from sticking, making removing it later much easier. It did seem to work!
  • Pour the batter into the pan and rap the pan against the counter several times to remove air bubbles.
  • Place the cake pan in a large, deep baking tray (I used my lasagna pan).
  • Pour hot water into the baking tray until it is about halfway up the cake pan. This is done to avoid harshly cooking the cake, and to prevent cracks from forming on the top.
Its like armor for your cake!

If you have made cheesecake before, you know that these are the two main headaches about them. Either the top cooks too quickly and becomes “chewy”, or you end up with a large crack in the top. By following these instructions, I was able to avoid both of those issues!

  • Bake for 1 hour, until set.
  • Turn off the heat and keep the cheesecake in the oven for another hour. This is another trick to avoid the dreaded crack in the top!
  • Remove from the oven and the deep baking pan and cool to room temperature on the counter.
  • Refrigerate for at least 4 hours (but overnight is best).

Yay! Cake is done!!

The Topping

The strawberry topping is what really makes this dessert look like the “Perfectly Preserved Pie” that you find in the video game!

It doesn’t require a lot of ingredients, just the ability to take your time.

You will need a fine strainer like this one if you don’t have one already:

Ingredients:

  • 2 pounds strawberries, hulled (see instructions below)
  • 1 cinnamon stick
  • 3/4 cup sugar
  • 1 tablespoon vanilla extract
  • Pinch of salt
  • 2 tablespoons cornstarch
  • 3 tablespoons water

Instructions:

  • Hull the strawberries. I find it easiest to use a plastic straw if you have an extra one lying around. Remove the leafy green top, then stick the straw through the bottom of the strawberry and out the top. Remove the white “hulled” section from your straw and move on to the next! Its so easy, a 6 year old can do it!
STAB IT WITH A STRAW!
  • Place the strawberries in a blender and puree until smooth. My food processor has a “puree” setting and that seemed to work well.
  • Pour the pureed strawberries through a mesh strainer to remove the seeds. This part takes the most patience. I used a spoon to help move the seeds out of the way and stir the mixture to help it go down. I ended up with a strawberry seed paste in my strainer, and a gorgeous strawberry sauce in my pan!
  • Place a large cinnamon stick into the pan with the strawberries.
  • Bring to a boil (this smells amazing!)
Yum!
  • Reduce the heat to low and add the sugar, vanilla extract, and salt.
  • Simmer for 10 minutes.
  • In a small bowl, combine the cornstarch and water. This dissolves the cornstarch so that you don’t end up with chunks of it in your topping.
  • Remove the cinnamon stick from the strawberries and add the cornstarch slurry to the saucepan
  • Whisk until it has slightly thickened.
  • Allow to cool and then cover and place in the refrigerator.
  • The sauce will fully thicken as it cools, so allow it to refrigerate for at least 2 hours (overnight is best)

My strawberry topping came out slightly thicker than what is seen in the cookbook’s photograph, but it was delicious! It would also be amazing on icecream!

You’re almost there!

Caramel Buttercream Frosting

Its tomorrow now!

Okay, so if you are feeling totally done with cooking, you could probably just use store bought buttercream icing. However, I think this stuff is worth the extra 15 minutes or so of work. It is amazing!

Also, I was making this for Valentines Day, so why not go all out?!

The recipe calls for a pastry bag to make the dollop of icing look extra cute, but I didn’t have the right size attachment. So, just a spoon will get the job done too!

Ingredients:

  • 1 cup (2 sticks) unsalted butter, at room temperature
  • 1/2 cup caramel sauce
  • 1 teaspoon salt
  • 2 to 4 cups confectioners’ sugar (I used 3, but I would recommend closer to 4)

Instructions:

  • In a standing mixer fitted with a paddle attachment, whip the butter until smooth.
  • Add the salt and caramel and whisk until combined. Add the confectioners’ sugar 1 cup at a time.
  • Continue to add confectioners’ sugar one cup at a time. I did 3 cups, but I think 4 would have given it more of the consistency you see in the book. Mine was very thick, creamy, and rich!

To serve, you will slice a piece of cake and drizzle with the strawberry sauce. Finally, add a small dollop of caramel buttercream icing on top!

Voila!

This fluffy, crust free pie with strawberry sauce is as delicious as it is beautiful! I look forward to using it this summer when these lighter desserts are especially nice!

Impress the Vault Dweller in your life, and have a great Valentines Day!